Showing posts with label Tips 'N Tricks. Show all posts
Showing posts with label Tips 'N Tricks. Show all posts
Monday, May 30, 2016
Sunday, May 29, 2016
Tuesday, May 5, 2015
How the heck do I ?......... Optigen Testing Edition
Submitting testing to Optigen for your Samoyed.
Wanna know what this is going to cost you, first? Find out HERE.
As of publishing, the combined RD/OSD and xl-PRA test price was $248 for the pair before discounts.
Blood can be collected by your veterinarian or a licensed veterinary technician and must be processed according to the instructions below.
Make an appointment to have a blood sample drawn early in the week to avoid shipping over the weekend. Inform the clinic in advance that the blood must be drawn into a small lavender (purple) topped vacutainer tube and that the blood MUST be unclotted.
Both the owner and the responsible veterinary staff must sign the form affirming a match of the dog described in the paperwork and the blood sample.
Supplies needed at clinic:
18-22 gauge hypodermic needles
3 ml or larger syringe. Syringe must be new, in original package, and never re-sterilized.
Lavender (purple) topped tube (EDTA anti-coagulant), any size is acceptable; however, 2 ml or larger is preferred. (They need at least 1 ml of blood for testing.) If necessary, ACD yellow topped tubes are acceptable substitutes.
Sealable (ziplock) plastic bag to hold tube and one piece of paper toweling or a napkin in case of breakage. (Don't wrap the tube, just place toweling in the bag.)
Two sticky labels marked with owner's name, dog's name and date - one affixed to the tube and the other to the plastic bag
If blood is being collected from more than one dog, a new needle and syringe must be used for each dog. Each dog’s blood sample must be put in its own labeled tube and labeled plastic bag. Be certain that each label corresponds to the correct sample.
Collection process:
COLLECT 1-3 ml of blood from the test dog.
IMMEDIATELY transfer the blood to the anti-coagulent tube (do NOT overfill tubes).
INVERT the tube several times to prevent clotting. Clotted blood cannot be used. Do NOT send clotted blood. If necessary, a new blood sample should be collected. Do NOT put tape over the cap of the tube.
Be prepared to ship the sample the same day as it is collected, if at all possible. If you must hold the sample for a while, make sure that it is refrigerated.
Normally, it is NOT necessary to ship by an overnight service within the US. US Postal Service 1st Class or Priority Mail is adequate. Other two to three day delivery services are also suitable. However, schedule the shipment so that it will NOT arrive during a weekend or holiday period. The package carriers do not take responsibility for refrigerating blood samples when delivery to the laboratory is delayed or suspended during holiday periods.
Packaging materials must be leak proof and meet the general requirements of the US Postal Service and other carriers. Appropriate packaging requires:
Blood tube inside a sealed plastic bag (or other sealed container).
Absorbent material inside the plastic bag. One paper towel is sufficient to soak up any potential leakage. Please do NOT wrap towel around the blood vial.
Cushioning wrap - bubble wrap sheets are best - wrap around the plastic bag loosely. Please DO NOT tape or staple to the plastic bag. DO NOT use household insulation.
Warm weather - if the temperature at your location at the time of shipping is 80 degrees F (26.67 C) or above, follow these additional instructions:
Obtain 2 freezable ice packs, available in hardware, drug and grocery stores.
Freeze them overnight. DO NOT SUBSTITUTE ICE CUBES, FROZEN FOOD PRODUCTS OR DRY ICE.
Obtain a styrofoam box that fits into an outer box and is large enough to hold the frozen ice packs and the sample and toweling in a plastic bag and add cushioning material as needed.
DO NOT freeze the sample before shipping. It will not freeze when packed as described here.
Put the request form and check in a separate sealed bad to keep them dry.
Ship the package by overnight delivery service.
Put in a sturdy container, either box or tube, with enough cushioning inside to prevent movement of the contents. If you use the US Postal Service, you can obtain a free box marked "Priority Mail" at your post office that is ideal for this purpose.
If you use a carrier other than the US Postal Service, please contact them for any special requirements they might have.
Enclose the request form and payment in the container. You will be notified via email when your sample arrives; if you do not use email, enclose a self-addressed postcard for receipt notification.
If the parents of your dog were both Normal for the tests you are doing AND you have a copy of their results certificates, you can get a discount! Fill out THIS form, and include all the necessary paperwork and an additional discount will be taken off your total bill.
You're going to have to decide if this discount is worth it to you because it DOES take extra work, (but you could see a pretty great discount depending on the testing) you will need (1) completed copy of the form (2) Optigen test reports for dam & sire documenting their Normal status (3) a copy of official document (e.g., registration) showing dam and sire as parents of this offspring
When you receive your test results, these have to be submitted to OFA if you want them to be listed on the OFA database, and in turn apply toward a CHIC number.
Go HERE to print the submission form you need to have your tests listed.
Complete the form now so you don't have to pull all this stuff out AGAIN when the test results arrive. It's almost exactly all the same info you just put on your Optigen forms.
When the results arrive, send the form in with a copy of the dog's registration, a copy of the test results, and the check to OFA for $15 per test / dog.
Mail to:
Orthopedic Foundation for Animals
(2018 update: Optigen is beginning to offer submission to OFA for
you - DO IT! It will save you work AND it is cheaper because they will
submit it electronically. )
Wanna know what this is going to cost you, first? Find out HERE.
As of publishing, the combined RD/OSD and xl-PRA test price was $248 for the pair before discounts.
Submission Form:
Note: If you know of a clinic going on that you want to be a part of, but you are not ready to submit your samples, you have one month from the date of your online entry to submit your sample and get the discount from the clinic. However, you must submit the entry during the days the clinic is valid.- Go to the Optigen website and submit an online entry. Click HERE to do it.
- Things to have ready:
- Your dog's registration number
- Your dog's registered name
- Your dog's permanent ID number (microchip/tattoo)
- Your dog's CERF/other eye number and exam date
- The registration number and registered name of the Dam
- The registration number and registered name of the Sire
- Info on any known eye diseases
- If you can, don't want to, or are otherwise against doing the online form, print THIS instead.
- Make sure you print your form from the online submission when prompted.
- click "Request DNA Test" to continue to the check out screen
- Request DNA test…a list of dogs just entered will appear, check the corresponding box(es) for RD/OSD and xl-PRA tests. (2018 update: add the DM test, for only a little bit more money now, this is absolutely worth it)
- If you submit your request online you will receive an automatic 5% discount…no code necessary. However, if you are participating in a 20/20, then you have to enter the code for that clinic. If you are submitting "Normal" info for both parents you will get the Normal/Normal discount applied AFTER that info is verified by Optigen. (info on submitting that below)
- Find out what clinics are going on now HERE.
- Click confirm request
- Order Confirmation screen…gives the amount due for the requested test(s). Here you will indicate how you will be paying…by check or credit card. Credit card is way easier if you are planning on Clear/Clear discounts because they will apply that discount after you submit and before your card is charged. If you want to pay by card, but it won't work, select check and call them with your card number after. They are very nice and will be glad to help.
- You will get a confirmation from Optigen
Blood Sample Collection:
Blood can be collected by your veterinarian or a licensed veterinary technician and must be processed according to the instructions below.
Make an appointment to have a blood sample drawn early in the week to avoid shipping over the weekend. Inform the clinic in advance that the blood must be drawn into a small lavender (purple) topped vacutainer tube and that the blood MUST be unclotted.
Both the owner and the responsible veterinary staff must sign the form affirming a match of the dog described in the paperwork and the blood sample.
Supplies needed at clinic:
18-22 gauge hypodermic needles
3 ml or larger syringe. Syringe must be new, in original package, and never re-sterilized.
Lavender (purple) topped tube (EDTA anti-coagulant), any size is acceptable; however, 2 ml or larger is preferred. (They need at least 1 ml of blood for testing.) If necessary, ACD yellow topped tubes are acceptable substitutes.
Sealable (ziplock) plastic bag to hold tube and one piece of paper toweling or a napkin in case of breakage. (Don't wrap the tube, just place toweling in the bag.)
Two sticky labels marked with owner's name, dog's name and date - one affixed to the tube and the other to the plastic bag
If blood is being collected from more than one dog, a new needle and syringe must be used for each dog. Each dog’s blood sample must be put in its own labeled tube and labeled plastic bag. Be certain that each label corresponds to the correct sample.
Collection process:
COLLECT 1-3 ml of blood from the test dog.
IMMEDIATELY transfer the blood to the anti-coagulent tube (do NOT overfill tubes).
INVERT the tube several times to prevent clotting. Clotted blood cannot be used. Do NOT send clotted blood. If necessary, a new blood sample should be collected. Do NOT put tape over the cap of the tube.
Packaging and Shipping Instructions:
Be prepared to ship the sample the same day as it is collected, if at all possible. If you must hold the sample for a while, make sure that it is refrigerated.
Normally, it is NOT necessary to ship by an overnight service within the US. US Postal Service 1st Class or Priority Mail is adequate. Other two to three day delivery services are also suitable. However, schedule the shipment so that it will NOT arrive during a weekend or holiday period. The package carriers do not take responsibility for refrigerating blood samples when delivery to the laboratory is delayed or suspended during holiday periods.
Packaging materials must be leak proof and meet the general requirements of the US Postal Service and other carriers. Appropriate packaging requires:
Blood tube inside a sealed plastic bag (or other sealed container).
Absorbent material inside the plastic bag. One paper towel is sufficient to soak up any potential leakage. Please do NOT wrap towel around the blood vial.
Cushioning wrap - bubble wrap sheets are best - wrap around the plastic bag loosely. Please DO NOT tape or staple to the plastic bag. DO NOT use household insulation.
Warm weather - if the temperature at your location at the time of shipping is 80 degrees F (26.67 C) or above, follow these additional instructions:
Obtain 2 freezable ice packs, available in hardware, drug and grocery stores.
Freeze them overnight. DO NOT SUBSTITUTE ICE CUBES, FROZEN FOOD PRODUCTS OR DRY ICE.
Obtain a styrofoam box that fits into an outer box and is large enough to hold the frozen ice packs and the sample and toweling in a plastic bag and add cushioning material as needed.
DO NOT freeze the sample before shipping. It will not freeze when packed as described here.
Put the request form and check in a separate sealed bad to keep them dry.
Ship the package by overnight delivery service.
Put in a sturdy container, either box or tube, with enough cushioning inside to prevent movement of the contents. If you use the US Postal Service, you can obtain a free box marked "Priority Mail" at your post office that is ideal for this purpose.
If you use a carrier other than the US Postal Service, please contact them for any special requirements they might have.
Enclose the request form and payment in the container. You will be notified via email when your sample arrives; if you do not use email, enclose a self-addressed postcard for receipt notification.
More Discounts: Normal x Normal Discount
If the parents of your dog were both Normal for the tests you are doing AND you have a copy of their results certificates, you can get a discount! Fill out THIS form, and include all the necessary paperwork and an additional discount will be taken off your total bill.
You're going to have to decide if this discount is worth it to you because it DOES take extra work, (but you could see a pretty great discount depending on the testing) you will need (1) completed copy of the form (2) Optigen test reports for dam & sire documenting their Normal status (3) a copy of official document (e.g., registration) showing dam and sire as parents of this offspring
SHIP TO OPTIGEN:
OptiGen, LLC
Cornell Business & Technology Park
767 Warren Road, Suite 300
Ithaca, NY 14850
If you want this information to be listed on OFA:
When you receive your test results, these have to be submitted to OFA if you want them to be listed on the OFA database, and in turn apply toward a CHIC number.
Go HERE to print the submission form you need to have your tests listed.
Complete the form now so you don't have to pull all this stuff out AGAIN when the test results arrive. It's almost exactly all the same info you just put on your Optigen forms.
When the results arrive, send the form in with a copy of the dog's registration, a copy of the test results, and the check to OFA for $15 per test / dog.
Mail to:
Orthopedic Foundation for Animals
2300 E Nifong Boulevard
Columbia, Missouri, 65201-3806
(2018 update: Optigen is beginning to offer submission to OFA for
you - DO IT! It will save you work AND it is cheaper because they will
submit it electronically. )Monday, September 10, 2012
The Best Bathing Set Up Ever. Seriously.
We've done a lot of trial and error and learning as we go with bathing/grooming/drying since I brought Mendel home. It takes some practice to get things right and it also takes some time to figure out what works best for you. What kinds of shampoos you like, what kind of comb, how long you like your table, how powerful does your dryer need to be, the list goes on forever...
One of our biggest challenges has been bathing. I'm tall to begin with and bending over just really ruffles my tail feathers. Even over the lip of a raised tub, it doesn't make me happy. Add the fact that the darn shower hose is NEVER long enough to reach the dog well and I don't like making a giant mess in my bathroom, the whole thing was just a nightmare. We tried going to those self grooming places, but the people are NEVER friendly when you have a hairy dog, the dryers are never powerful enough, we get stuffed in prison cell sized rooms, and almost never feel like we can take the time we need to do a good job. Not to mention it was expensive.
So, I started just bathing outside on the deck with the hose. If I put a mat on my grooming table covered with a plastic sheet at least I didn't have to bend over, but the dogs were NOT thrilled about this given the exceptionally freezing cold water they were getting bathed with. My feet, and everything else, got completely soaked (and not wearing shoes while standing and grooming was rough on my feet). We NEEDED to find a better way.
There is a product marketed to professional groomers called a Hydrosurge. It's essentially a system of bathing that uses a pump to recirculate a soap and water solution while bathing a dog. The benefits are 3-fold: You use less water, you use less shampoo, and you can get the dog cleaner with less effort. The soap and water solution makes it so you don't get a bunch of soap in one spot and totally miss another and it's also significantly easier to rinse out when you don't have gobs of soap in the coat. Less scrubbing is required because the water and soap solution is sprayed into the coat and largely doing the scrubbing work for you.
One major advantage for us with a recirculating system is that we can use pails of nice warm water to wash and rinse rather than trying to use an outdoor faucet while still keeping all the mess of bathing outside.
The problem: These pump systems cost $500+
 | ||
| A Hydrosurge Pump System |
Ok, so let's say I go buy this $500 pump system... I still don't have a good place to use it. And... FIVE HUNDRED DOLLARS? Good grief!
This was one of those times when "do it yourself" was definitely my best option.
Here's how I did it...
 |
| Lilly "enjoying" our home made Hydrosurge tub system |
First, I bought a 50 gallon Sterilite bin at Walmart for $18. I found other bins at other places, but I feel the shape of this one is the best for our purpose so I decided to get it. I knew one of my absolute requirements was that the side be cut out of the tub so I don't have to reach over the side to get to the dog.
I also knew that if I didn't get the cut out at least pretty even it would drive me nuts so I used a string tied to a sharpie to make a perfect half circle. I scored along the sharpie line with a utility knife so that when I used a sharp kitchen knife to cut through the plastic it would slide smoothly along the scored line. It worked beautifully.
Only once did I manage to crack the plastic just a little along the cutting line, but it was a small crack and pretty insignificant. I knew I would be "finishing" the edge of the cut so I wasn't terribly worried. I suppose you could leave this cut edge exposed, but I'm sure it would scratch your arms. I took a pool noodle and measured it to the cut edge then sliced down one side so it would slide over the cut edge of the tote. I thought I might have to find a way to attach or glue the noodle down, but it stays there perfectly all on its own.
Now for the drain. I purchased this kitchen sink drain assembly at Walmart for $10. I later saw it at Fleet Farm for $9. (darn!) It comes with everything you need to attach the drain.
I unscrewed the washer piece that holds the drain in place and set it on the bottom of the tote where I wanted to put the drain. Since I'm right handed and would want the hose on the right side I decided the right side of the tub would be best for the drain. I put the drain in the right front corner so it would be easier to place the catch pail under it. I traced the washer with a sharpie and cut the hole for the drain using the same method as I did for cutting out the side.
I figured it would be better for the hole to be tight than too loose so I cut, tested, trimmed a little more, tested, etc until it fit just perfect. The rubber O-ring that comes with the drain should go on the top side of the tub.
Here's a pic of the drain in place. Get the washer good and tight by wiggling the tote around and tightening.

Technically I suppose you could just leave the drain like this, but I wanted to have a little "aim" with the drain so I bought a drain tailpipe for $3 to attach. The drain already comes with the washer necessary to attach this.

It's very important you get a good drain strainer to put in your drain. You definitely do not want to get hair into your catch bucket and wind up ruining your pump with it. I bought this nice one for only $3. It's pure mesh and sits very nicely down into the drain. With it's nice deep cup shape it will catch and hold all the hair, but sill allow water to flow down through it. This is the #1 reason I decided to go with a sink drain rather than a flat tub type drain which would have been far more difficult to keep clear of hair for good water flow. Having used the system for a couple baths now, I can tell you I was absolutely right about this. The sink drain style is MUCH better than a tub style drain for this purpose. (In fact, I can't believe professional groomers haven't caught onto this for their bathing tubs)
For the pump, all you need is a submersible utility pump. You don't need a float switch on it. I lucked out and get to borrow my Dads pump that he uses to water his flowers (from rain barrels) for free. My Grandpa picked it up for him at a rummage sale and paid less than $20 for it. You can buy a new pump for about $50 on Amazon or at a local hardware store. This pump is 1/4 HP and I find it's definitely powerful enough to get the job done.
Be extra careful about plugging and un-plugging your pump! The whole thing gets a lot more expensive when you factor in a hospital visit... or worse. This is one thing about the original Hydro Surge that is really nice - it comes with a foot switch for turning the pump on and off. You CAN buy foot switches at a hardware store and I'm seriously considering getting one to hook up to my pump when I buy my own.
You can use any length garden hose you want, but I find it's MUCH easier if you have just a cheap 10ish foot hose rather than fighting with an extra 20-30 feet. I bought my 10' hose a while back for another purpose and I think I paid only around $12 for it. You can use lots of different hose ends, but I found I actually like just using a garden wand end the best. Not one with the jet spray options or anything, just a wand end with a screen on it.
I purchased a cheap bath mat with the little suction cups on the bottom for $4. I'd say it's definitely worth it to not have the dog slip in the tub.
For Lilly I had (3) 5 gallon pails of warm water ready. 1 for soap, and 2 for rinsing. I didn't really need the whole 2nd rinse pail for her, but I made it up just in case.
For Mendel I used 4 pails. 2 for soap and 2 for rinsing. I would definitely use both rinse pails for him.
Here's how it goes...
Notice from the pictures my tub is set sideways across the end of my grooming table. I found this worked beautifully for me. You can experiment with different ways of setting up your tub. You can even build a frame for it if you like, but I definitely recommend trying the grooming table idea. It's very convenient and doesn't cost any extra money or space. Also, at this height, I never had to bend over other than to pick my dog up which made me VERY happy.
Fill the appropriate number of 5 gallon pails you need with water slightly warmer than you would normally bathe your dog with. This is because the water will cool off fairly quickly once you get it running through the system and most of the buckets will be sitting for a bit before you get to them, anyway.
Put the dog in the tub and place your first pail under the drain tailpipe. Make sure your drain strainer is securely in place. Place the pump with the attached hose into the pail and squirt your soap into the bucket of water. Don't dump a ton of soap in right away, no need to waste it. Turn on the pump and begin wetting your dog down. Make sure the water from the drain is pouring nicely back into the pail - you don't want to run your pump dry. After you've been going for a bit evaluate your soap level and add a little more if you feel you need it. Even if your water is dirty, the soap will continue working. I'll spare you the science lesson, just trust me. :)
Once you've thoroughly soaped and scrubbed with this pail of water (don't be afraid to use your hands to scrub in the dirty spots, it's not 100% scrub-free), you're likely to be ready for a new nice warm pail of water. Unplug the pump and remove it from the pail. Let the tub drain completely and set the pail of dirty water aside (or just dump it if you're outside), remove the strainer and clean any collected hair from it then replace it. Set your next pail of water under the drain, place the pump in the pail and plug it back in. Either add soap to this pail or just use this water to rinse depending upon how dirty/big/etc the dog is.
Repeat the process, if necessary, until your dog is rinsed to your satisfaction. I know what you're thinking - "Are you SURE I can actually get my dog completely rinsed even though he had that soapy water on him and I'm not using completely fresh water from the faucet to rinse?" Yes, I'm sure. Especially if you use two rinse pails. I was concerned about the very same thing myself, until I tried it. You will see that the coat feels very clean and well rinsed and you won't see suds in the water. This is largely because you didn't load up the coat with soap in the first place, you just used the soap you had far more effectively.
If you wish to apply conditioner to your dog, add a SMALL amount of conditioner to your rinse pail and apply it to your dog. You may wish to wrap things up here or use another clean pail of water to rinse the conditioner. I find as long as you don't put too much conditioner in the water you really don't need to rinse any further. This is the most wonderful way to apply conditioner because you don't end up with a bunch of it in one spot and you can apply a very small amount very evenly throughout the coat.
When you're all done bathing, remove the dog then remove the tub from the table. I find it works great to just set the tub on your empty 5 gallon pails so the drain pipe can hang freely. Now your table is all ready for drying time. :) Check out my suggestions for a dryer here.
I actually used a "real" Hydrosurge system in a huge fancy tub (I'm certain their system cost over $1,000) at a grooming facility recently and I can honestly say I found this home made system to be much easier to use. Also, because it's a more manageable size I was able to use less shampoo in my system. Not to mention, I built my whole system for what they would charge me to bathe my dog in theirs only a few times.
Once you've bathed this way, I'm certain you'll never want to go back. I know I sure don't, and I'm positive my dogs appreciate a nice warm bath rather than freezing to death from hose water. I appreciate a bathroom that's not sprayed with soap, water, and dog hair.
Tuesday, July 3, 2012
Life at Photo 51: Show time!
Getting pretty for the show!
First we got his feet and hocks all nice and trimmed up.
Nice bath and blow dry and Mr. Mendel is looking lovely. He's FINALLY starting to get some big boy coat in. Hopefully he'll keep it for a while this time. :)
 |
| 19 Months Old |
 |
| At the show. I spy a little girl's tail.... |
Your Photo 51 tip for the day:
I've been eyeing these "On Ice" bags to keep the dogs cool at shows or other events for a while, but they're just so expensive.
The other day while at the store looking for something else, some great big camping dry bags caught my eye. It occured to me that if you're supposed to be able to fill a dry bag with gear and keep it from getting wet, it just might work to fill the bag with something wet (like ice) and keep it from leaking out. For $13.00 I was willing to find out. It worked amazingly well.
Would I fill the thing with water and hang it upside down over my computer? Certainly not. But it did a pretty good job of holding everything in, and one must expect there to be water even with a completely watertight container because the bag will sweat in a humid environment. I just put a towel under and on top of the bag and had Mendel lay down on it.
As you can see, he definitely approves of his new ice bag!
Monday, June 25, 2012
Tuesday, December 14, 2010
Raw Feeding My Way
As those who know me may be aware, I feed my dogs a prey model raw diet. This post is not here to convince anyone to feed raw, it's not here to diagnose problems, it's not even here to say this is what I think every dog owner should be doing - it's simply to show how *I* do it. I'm always happy to further discuss raw feeding with anyone interested. This is just here to give people an idea of one way it can be done.
Some important factors to note: I am a college student. I work. I have homework. I have two dogs, one of which will NOT tolerate a lack of exercise. I don't always have extra time to spend on feeding my dogs every day. I say this simply because one of the most common excuses people give me for not raw feeding is a lack of time. This is the way *I* have found to make it work for me and my dogs, even with time constraints.
Let's get started!
A few days ago, I took all the meat I would need for meals out of the freezer and put them in the fridge to thaw. This morning I bought any of the fresh meat I needed to buy at the grocery store. (I'm always sure to buy when I see meat on sale and toss it in the freezer for when I need it, so usually everything just comes from the freezer) It takes a little time to get the hang of just exactly how much of everything to thaw, but sooner or later you get the hang of it.
Now, it's time to get down to business.
First, turn on the radio and pour a glass of wine. (use a long stemmed wine glass so you can take a drink without putting your bloody hands anywhere near the drinking area of the glass) :)
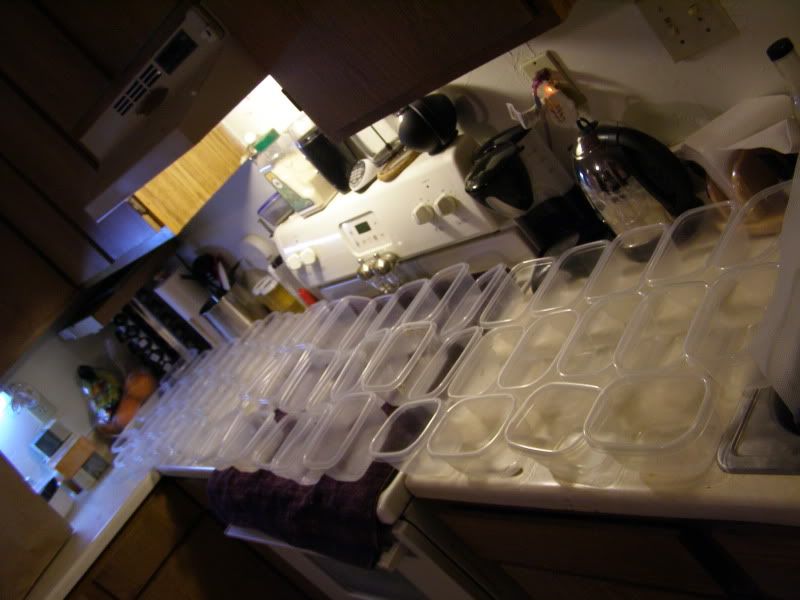
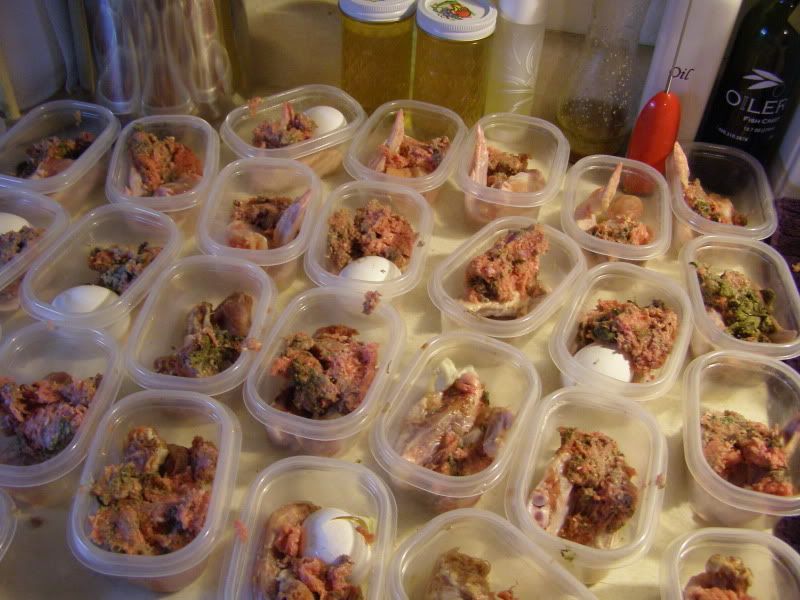
I always set out all of my available containers so that I can best plan out how I'm going to divide everything among them and I know what I'm working with.
Beef liver grosses me out about as much as the tripe, but I still use it.
Now, all that's left to do is sanitize EVERYTHING! Healthy dogs can handle e.coli and salmonella, humans cannot. Make sure you're using something that will kill these bacteria and give it a minute to do it's job before you wipe it down. Also, be sure to get the handle of the freezer well, remember you'll be touching that every time you feed your dogs!
Some important factors to note: I am a college student. I work. I have homework. I have two dogs, one of which will NOT tolerate a lack of exercise. I don't always have extra time to spend on feeding my dogs every day. I say this simply because one of the most common excuses people give me for not raw feeding is a lack of time. This is the way *I* have found to make it work for me and my dogs, even with time constraints.
Let's get started!
A few days ago, I took all the meat I would need for meals out of the freezer and put them in the fridge to thaw. This morning I bought any of the fresh meat I needed to buy at the grocery store. (I'm always sure to buy when I see meat on sale and toss it in the freezer for when I need it, so usually everything just comes from the freezer) It takes a little time to get the hang of just exactly how much of everything to thaw, but sooner or later you get the hang of it.
Now, it's time to get down to business.
First, turn on the radio and pour a glass of wine. (use a long stemmed wine glass so you can take a drink without putting your bloody hands anywhere near the drinking area of the glass) :)
I always set out all of my available containers so that I can best plan out how I'm going to divide everything among them and I know what I'm working with.
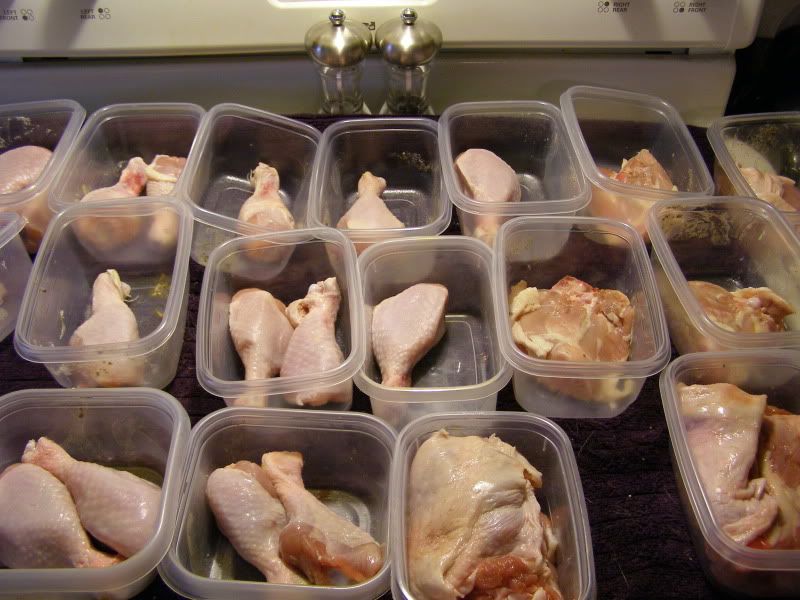
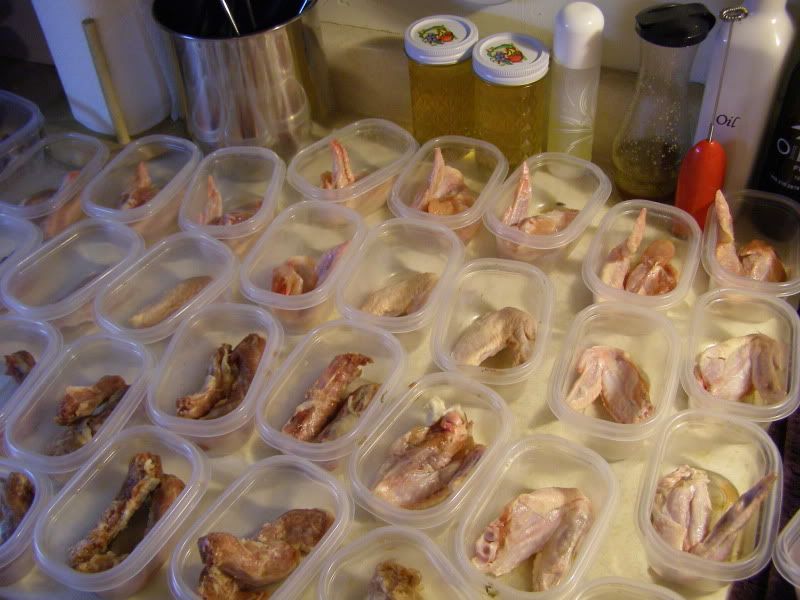
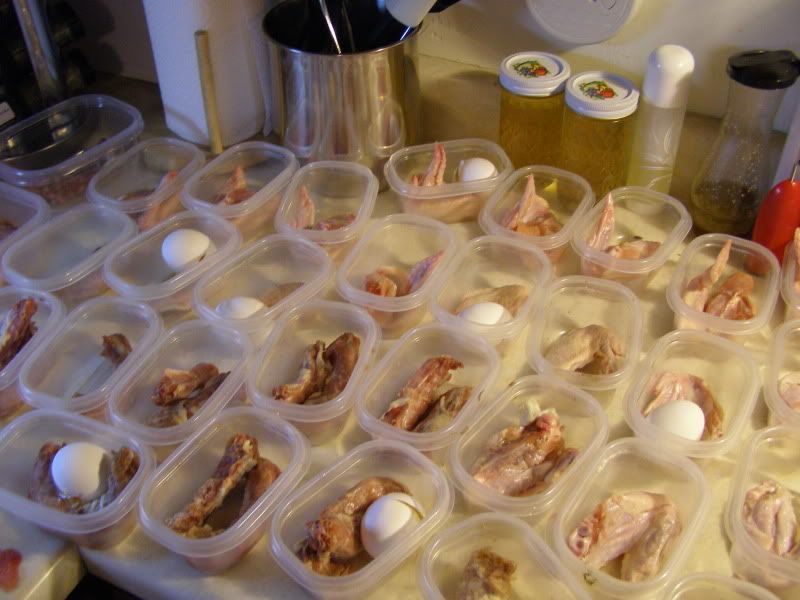
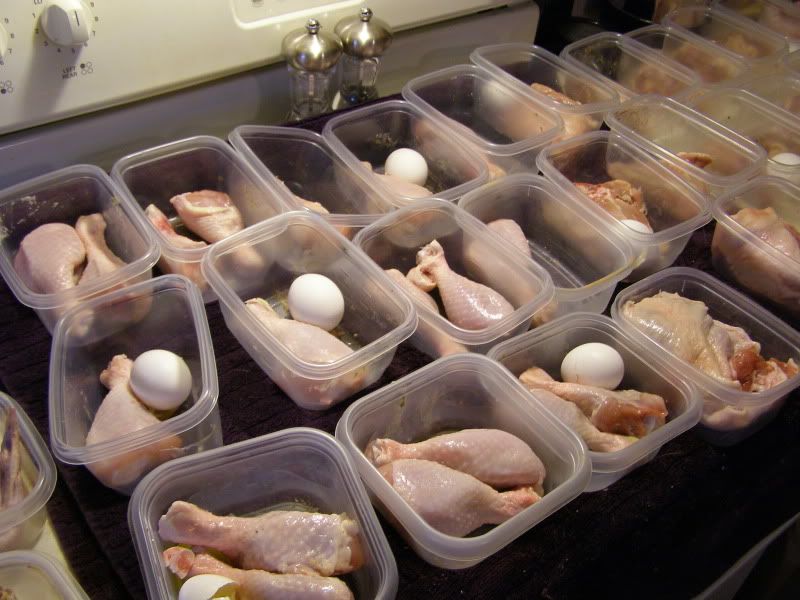
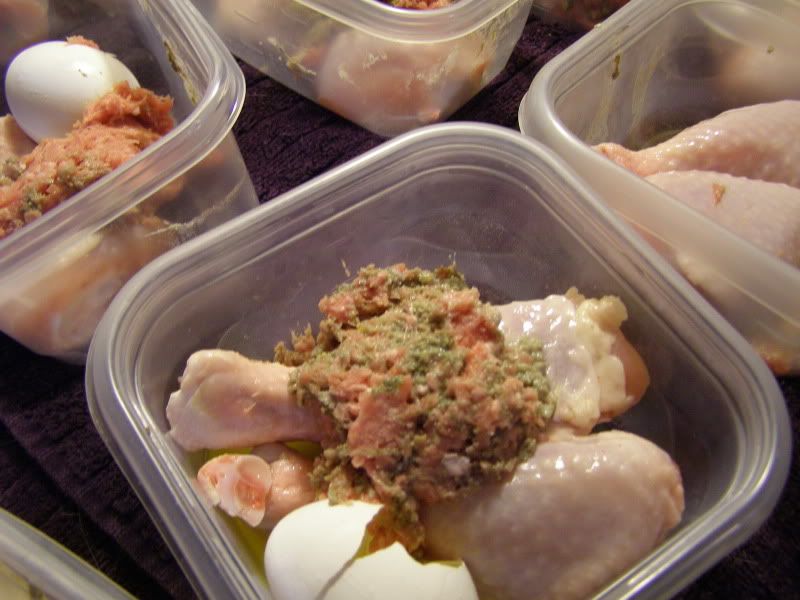
Once they're all spread out, I add my "bone in" meats to each container. Usually this is in the form of chicken necks, wings, legs, thighs, ribs etc. Other things can be used, but this is usually what I end up using. Bone should make up about 10% of your dog's diet. This doesn't necessarily have to be precise in each container, but it should average out in the end.
As you can see, I use two different sized containers. This is because I have a 65lb dog and a 40lb dog. An adult dog should eat somewhere around 2-3% of his body weight in meat per day. This means Bailey should eat about 1.5lbs a day and Lilly about 1lb a day. They probably eat slightly less than this for meals because they get other things to eat here and there, but this is a beginning guideline.
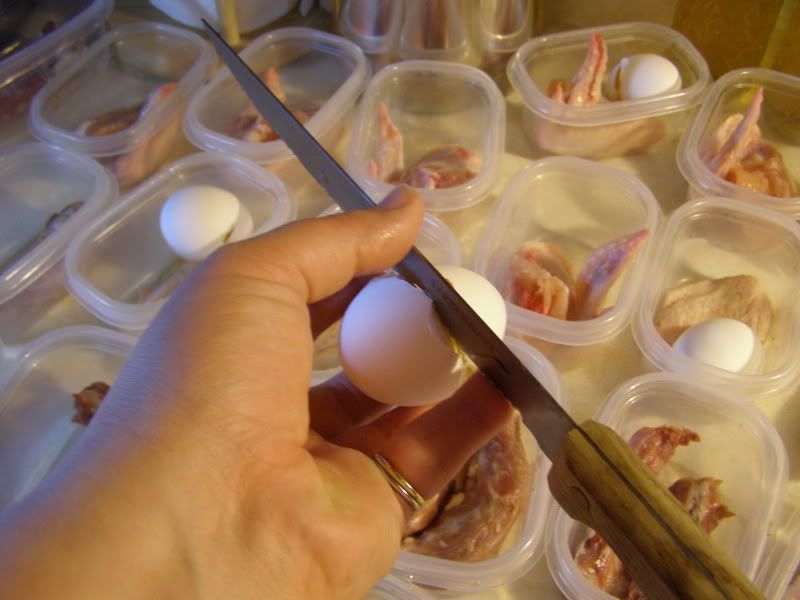
Next, I add eggs to some of the containers if I have some around. I could leave the eggs unbroken and the dogs would get them down just fine, but I whack them each with a knife just to get them started.
As you can see, I do NOT put an egg in every container. Eggs are great for the dogs, but one every day would be too much.
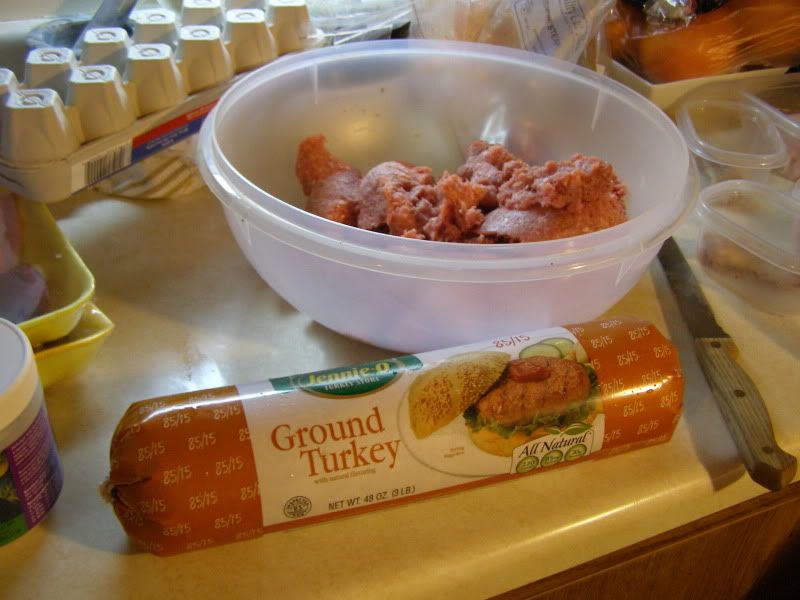
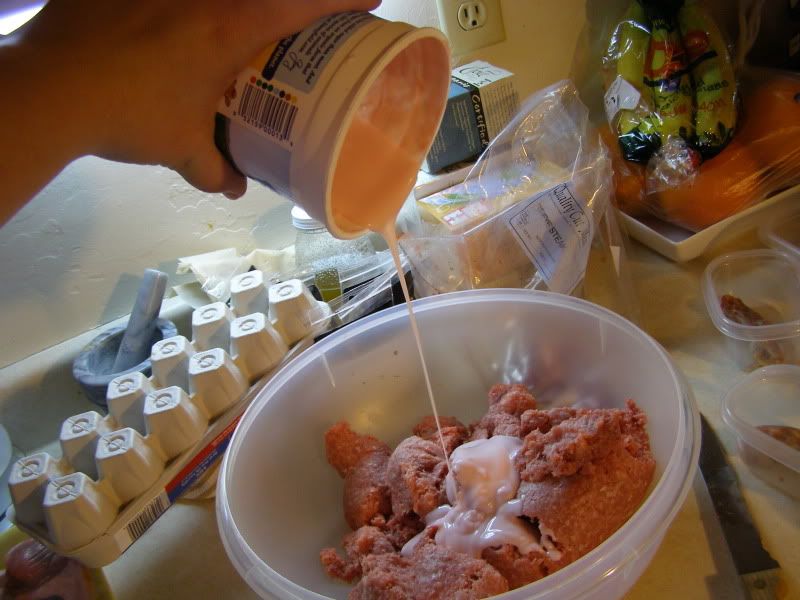
Now it's time for the real fun. It all starts with a few pounds of ground meat. I usually use turkey because my local grocery store sells nice big tubes of it for a pretty reasonable price.
This is the part where I manage to get rid of whatever suitable foods might be lingering in my fridge such as recently expired yogurt, etc.
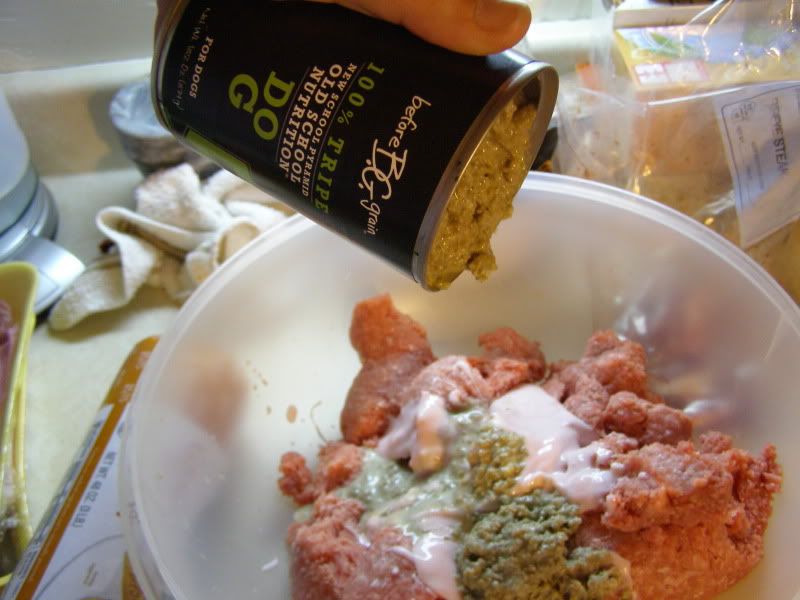
If you happen to be delicate in the olfactory department, you might want to give yourself a little pep talk at this point. You can do it. Deep breath. Now... it's time for the green tripe.
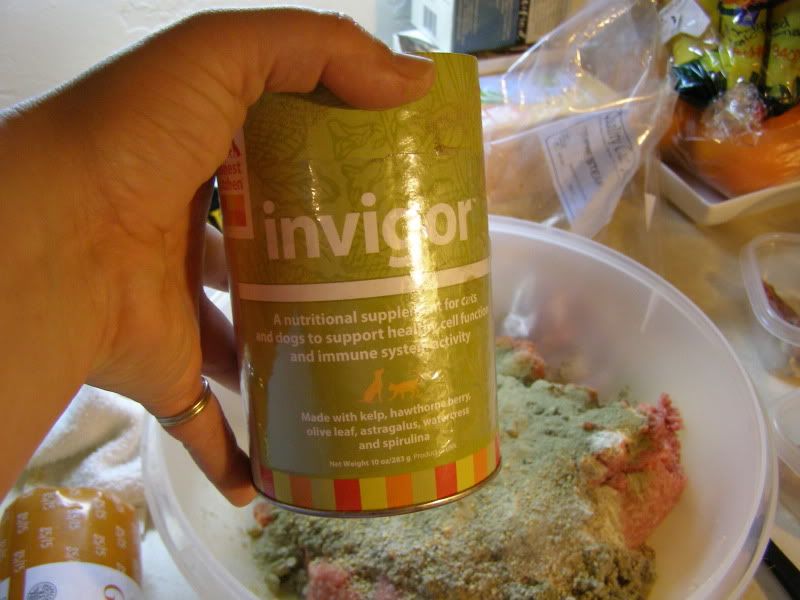
I also add some powdered supplements to this mixture. This is not absolutely necessary. If I don't have the extra cash for them, I don't include them. I recently bought this one because it has kelp powder in it, and it was on sale. Just plain kelp powder would work just fine as well.
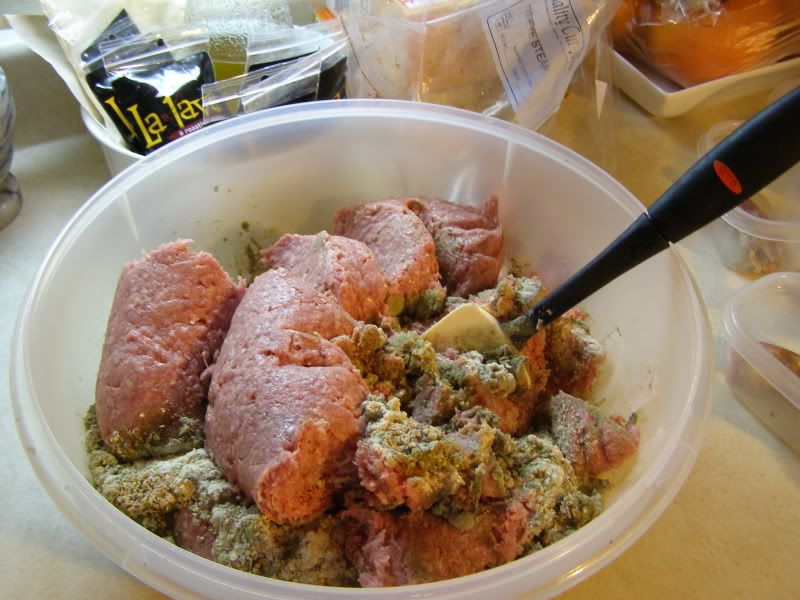
Alright, unplug your nose and get stirring!
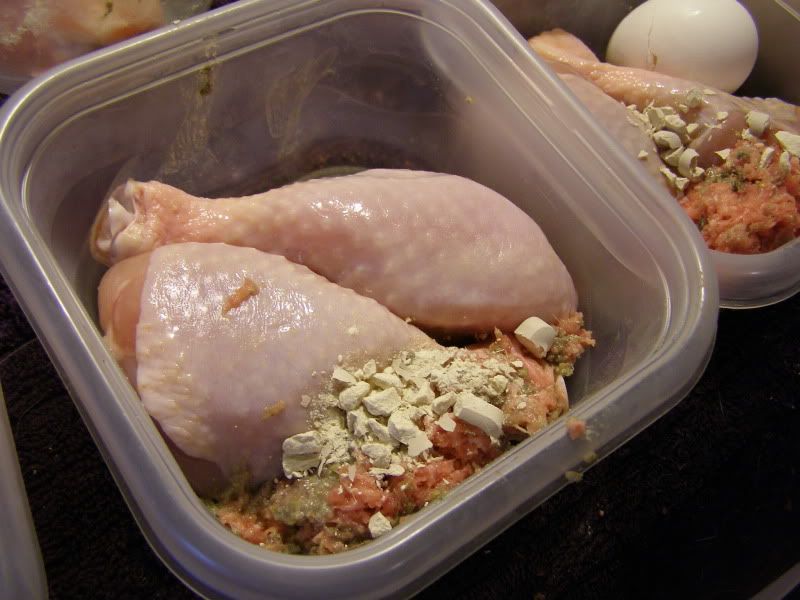
I then put a little of the mixture into each container.
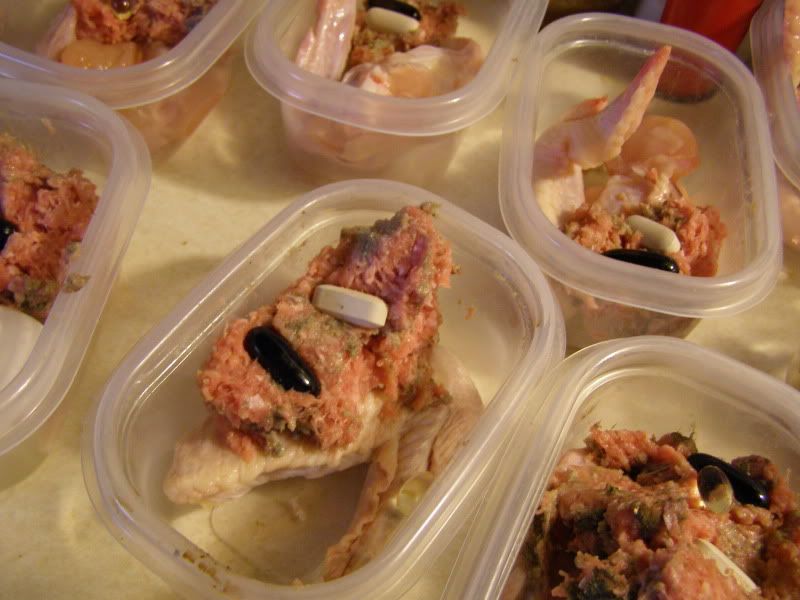
If I didn't want to, I really wouldn't have to include this ground mix, but it makes it easier for me to add yogurt, or supplements, or whatever else I might need to. It also makes it MUCH easier for me to add the things that are a necessity. Things such as fish oil.
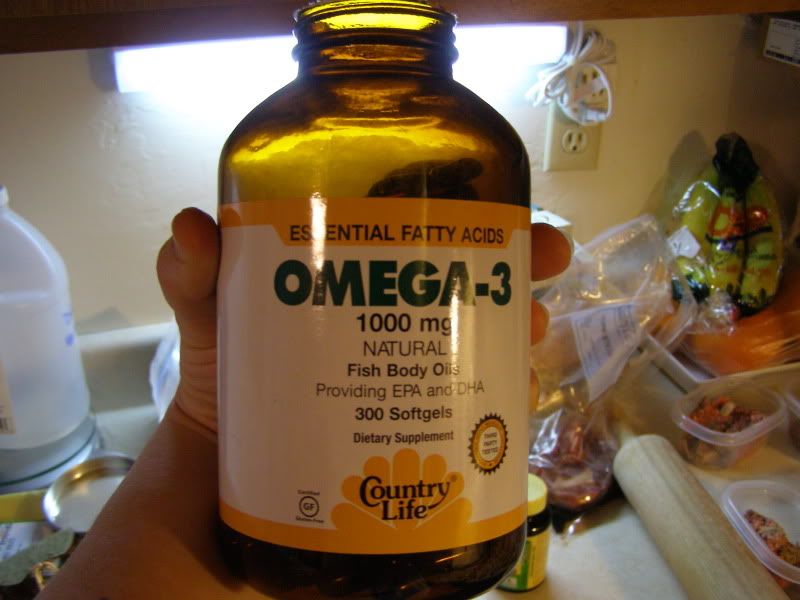
Because many commercially raised meats lack the omega 3 fatty acids that good naturally raised meats would have, adding fish oil is the one supplement I consider mandatory. By using the ground mixture, I have a great spot for sticking the fish oil capsules and tricking the dogs into eating them.
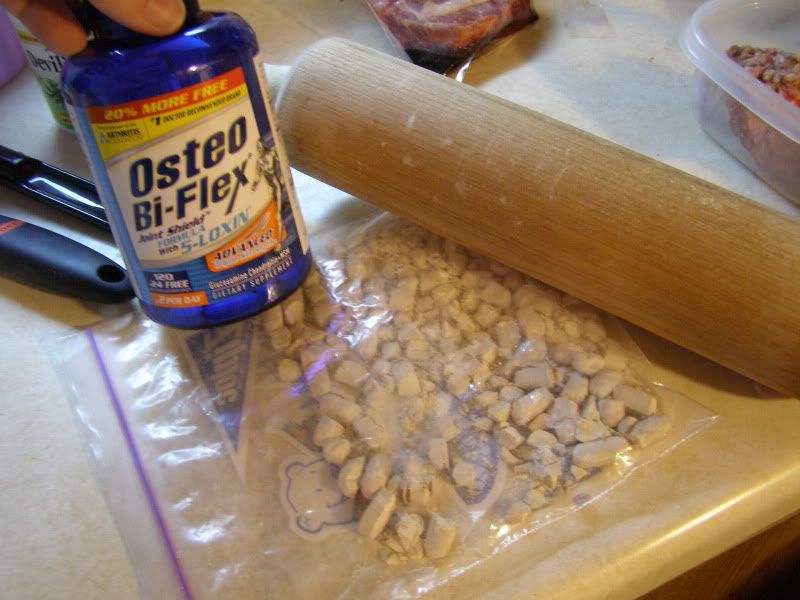
Also, since I have an old man with sore hips, glucosamine and chondroitin supplements are at the top of my list of things to include. Unfortunately, the old man's delicate sensibilities are offended by tablets. So, out of pure ridiculousness, I break up these supplements for his meals. (I still can't even believe I do it)
(when this bottle is gone, we will be going back to using Joint Strong - which I like MUCH better)
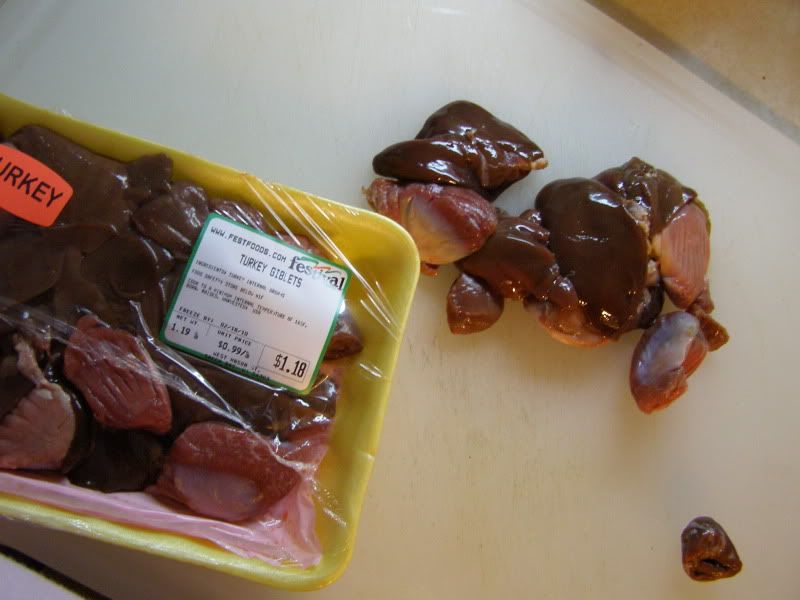
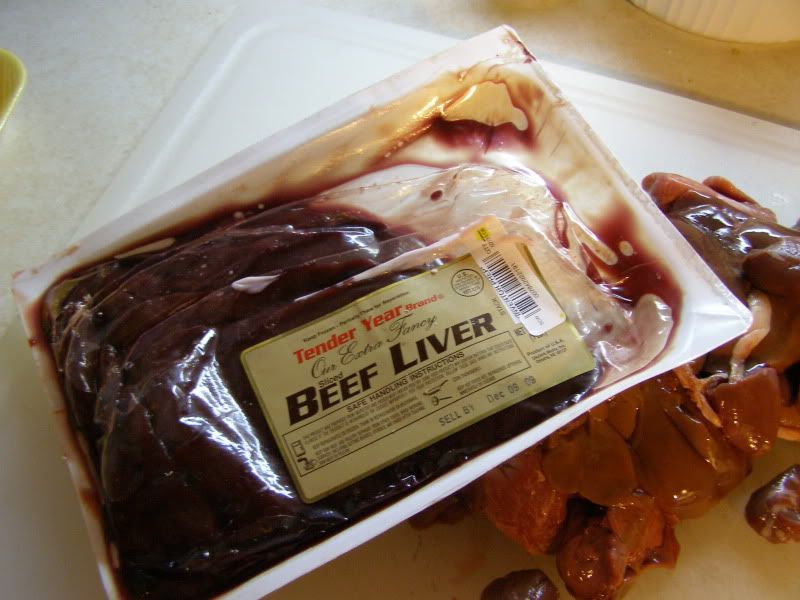
The next necessity is organ meat. On average, meals should consist of 10%-15% organ meat. (5% should be in the form of liver) Kidney has been one of the easiest organ meats for me to get locally. Chicken and turkey giblets are also usually easy to get.
Beef liver grosses me out about as much as the tripe, but I still use it.
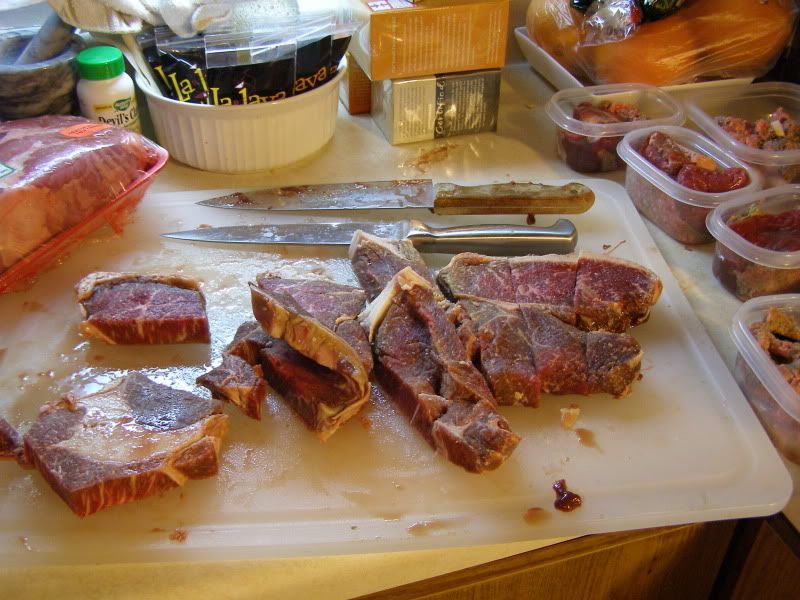
Last, but not least, I add whatever muscle meat I have to complete the 80% that an average meal should contain. A huge portion of this stuff I get for free from hunters with venison they don't want or people who forgot about the steaks in their freezers. Every once in a while I will find beef on a great deal at the store, and I know a few people who have cattle and I can get good deals on the "less desirable" meat when they butcher. Lastly, I can buy beef heart for around $1 a pound special order from my local grocery store. (yes, I know heart is physiologically considered an organ, but it's pretty much all muscle so it's counted as muscle meat)
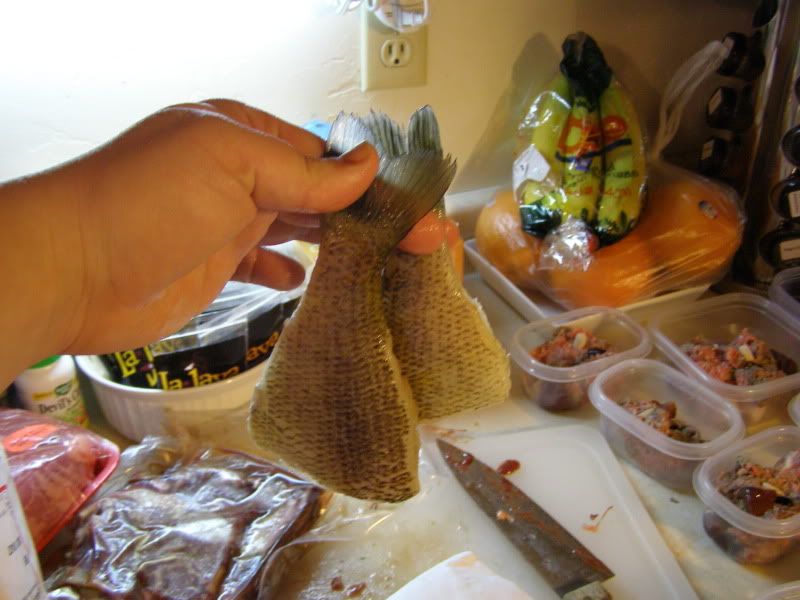
This summer I'll be getting myself a fishing license to see how much of this I can catch for myself. These were free from a driver at work.
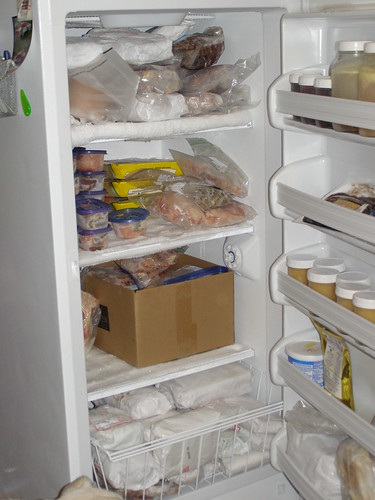
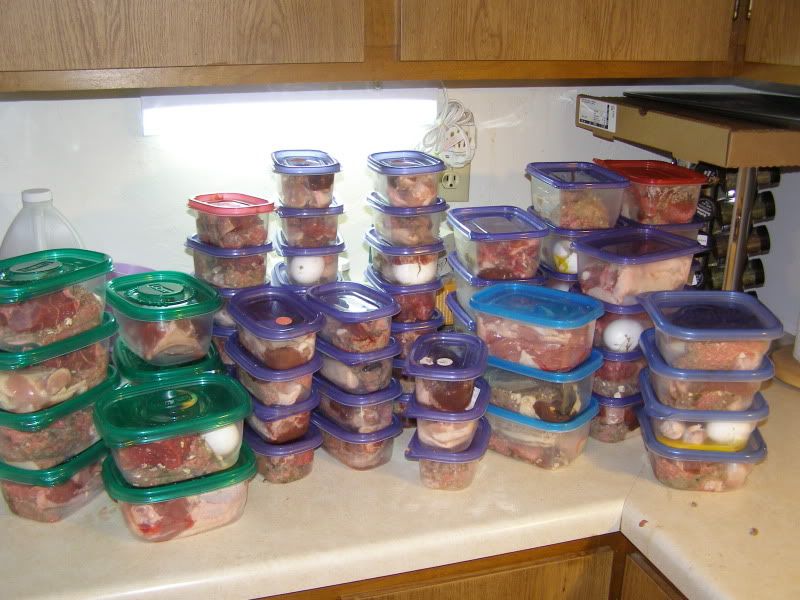
And there you have it folks. A solid month's worth of meals.
All I have to do now is pull it out of the freezer, run water over the outside of the container, pop it out onto the dogs' mat, and let them chow down.
(I like feeding it frozen because it slows the dogs down, doesn't smell at all, and is good for gnawing)
Total elapsed time: 1 hour 35 minutes
(and 10 of this was wasted fighting with those god-forsaken Glad containers with the green lids on the left - never buy those, they will make you want to rip your hair out!)
Total elapsed time: 1 hour 35 minutes
(and 10 of this was wasted fighting with those god-forsaken Glad containers with the green lids on the left - never buy those, they will make you want to rip your hair out!)
Now, all that's left to do is sanitize EVERYTHING! Healthy dogs can handle e.coli and salmonella, humans cannot. Make sure you're using something that will kill these bacteria and give it a minute to do it's job before you wipe it down. Also, be sure to get the handle of the freezer well, remember you'll be touching that every time you feed your dogs!
Subscribe to:
Posts (Atom)


